Old Original Article…
As a blogger, I was surprised when I couldn’t find a simple way to take screenshots on my new Android mobile phone especially since the process is so dead simple using an iPhone. Anyway, a lot of people have been asking about this including grooveDexter on his Samsung Galaxy S. Fortunately, after playing around all hope is lost! There actually IS a way to take screenshots on an Android and this groovy guide will show you how in our typical step-by-step process. The best part is using this method, you won’t need to transfer your images from your phone to your computer for blogging since your computer is what is capturing the images. This is going to be a rather long guide (possibly the longest on groovyPost!) so I’ll break it down into five different sections. Click a section to move directly to it: Let’s get started.
#1. Download the Development Kits
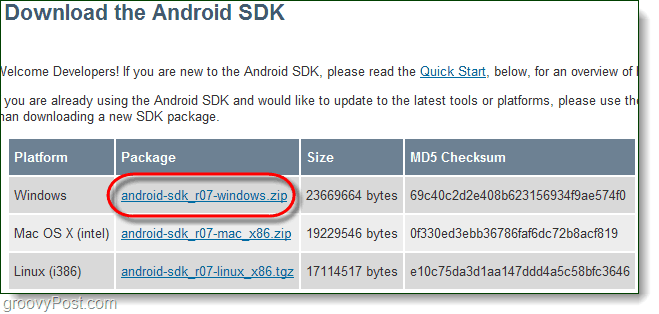
Step 1
Download the Android software development kit.
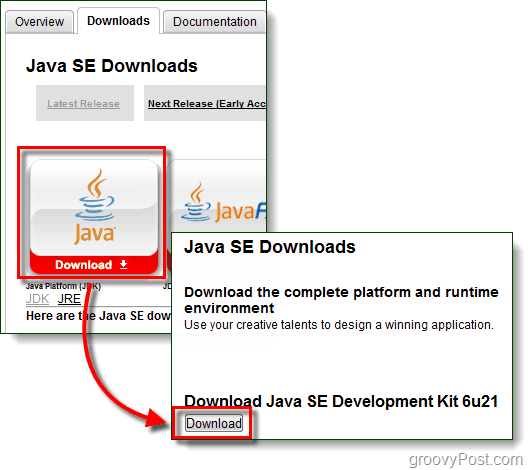
Step 2
Download the Java SE software development kit.
Step 3 – Optional: Device drivers (For Samsung Galaxy S users only)
When you plug-in your phone it’s most likely that Windows won’t be able to automatically find the driver to make your computer recognize the device. For Samsung Galaxy S users this is especially true, you will need to download the driver below. Download USB Drivers for the Samsung Galaxy S – or – Download Here Once the download is complete just run the Setup.exe file within the package to install the drivers on your computer. These drivers are specific to your phone, so if you are using a different device the above ones won’t work. If you need help tracking down drivers specific to your device please leave a comment below or make a post in the groovy technical support forum.
#2. Install The Java Runtime And Setup The Android SDK
Step 1 – Java
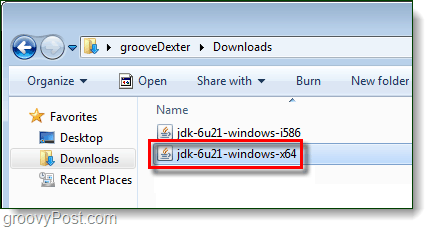
To set up Java is easy, just run the downloaded jdk-6u21-windows-* file to start the installer. The installer is near automatic, Click Next a few times to complete it. Once installation finishes, congratulations! You are done messing around with the Java SDK!
Step 2 – Android
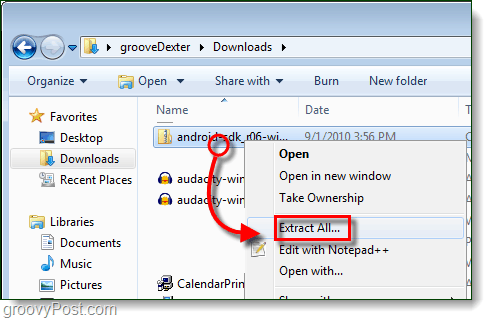
Right-Click the compressed android-sdk_r06-windows file you downloaded and Select Extract All… Extract it to the folder that you would like to install it to. There is no installer within the package so wherever you extract it will be considered the installation path.
Step 3 – Run Android SDK Setup
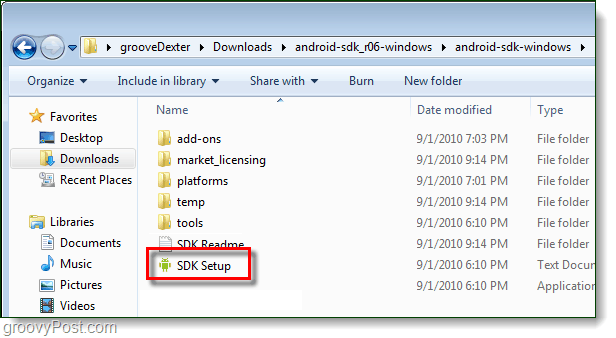
In the android-sdk-windows folder that you just extracted Double-Click SDK Setup to launch it.
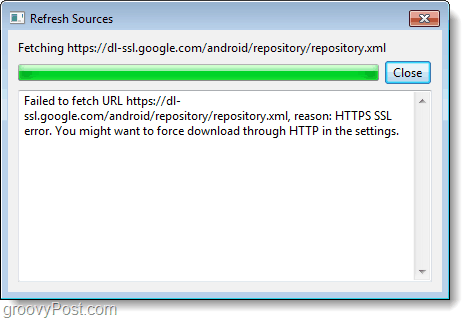
Step 4 – Fix the Download Error
9 out of 10 people will run into the error:
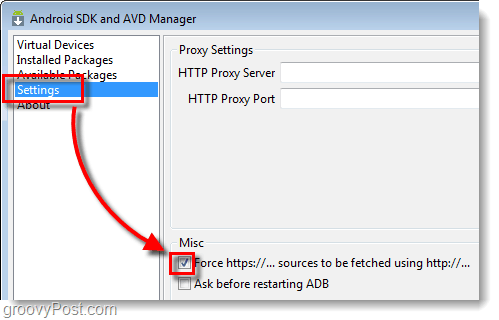
To fix the above error, Click the Settings tab and Check the box for Force https://…
Step 5 – Download SDK Packages
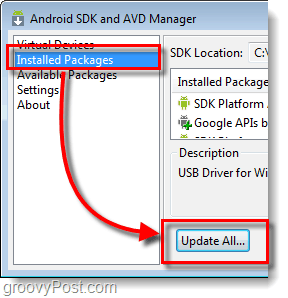
Click the Installed Packages tab and then Click Update All…
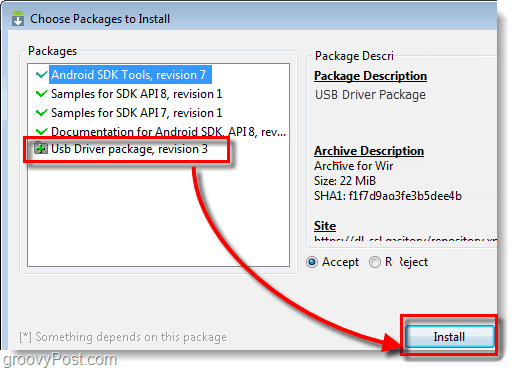
A list of available packages will appear, you must Install the USB Driver package. All other packages are optional.
#3. Enable USB Debugging On Your Android Phone
This is the only part of this how-to you will have to do on your actual Phone. For a detailed guide read this previous article. How-To Enable USB Debug Mode On Android Otherwise follow these abridged instructions:
Launch the Settings app.Navigate to Settings > Applications > Development > Check the box titled “USB Debugging”
#4. Set Up USB Drivers For Your Device
Step 1
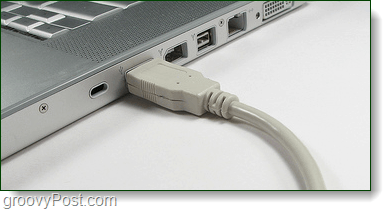
Plug your Android Phone into your computer using the USB charging cable.
Step 2
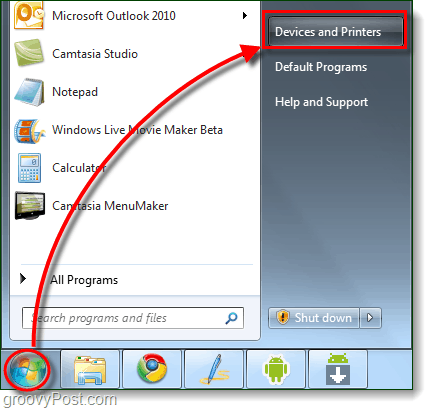
Click the Start Menu on your computer and Open Devices and Printers.
Step 3
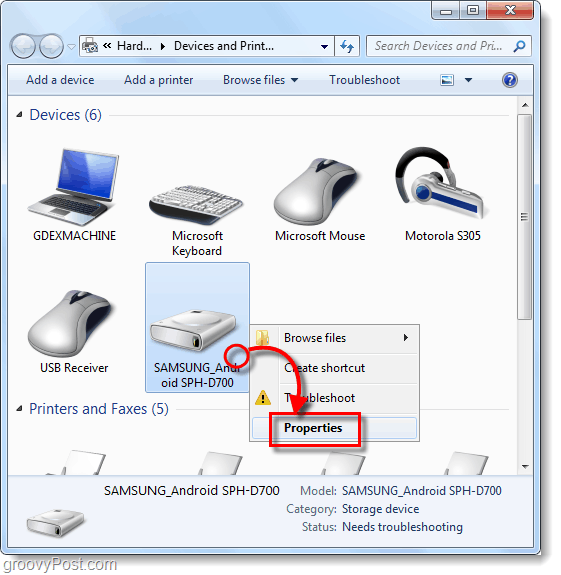
In the Devices list your Android phone should appear. Right-Click the phone and Select Properties.
Step 4
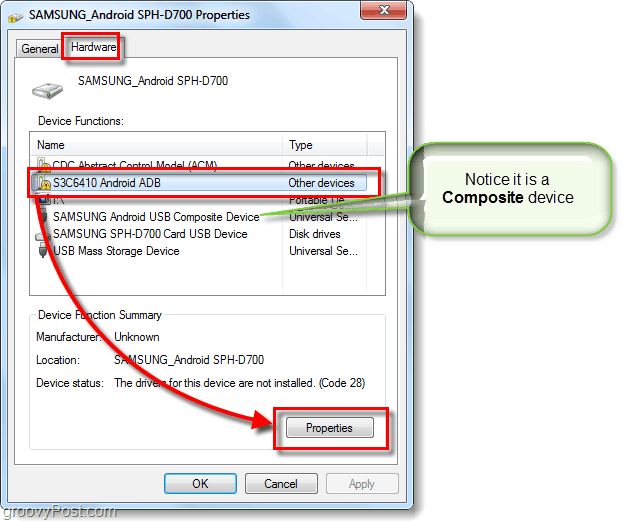
Click the Hardware tab and then Select the line that reads Android ADB. The rest of the drivers should for the most already be installed, but you may have to download device specific drivers as mentioned in part #1 of this guide.
Step 5
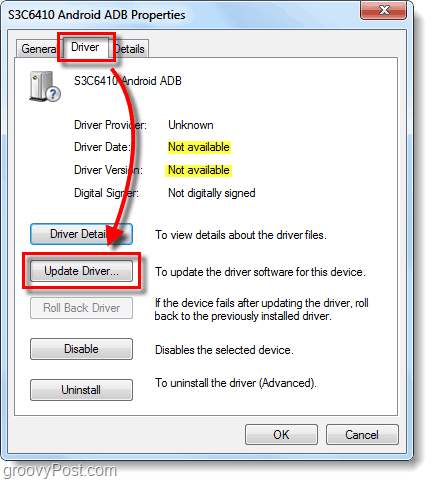
Click the Driver tab and then Select Update Driver…
Step 6
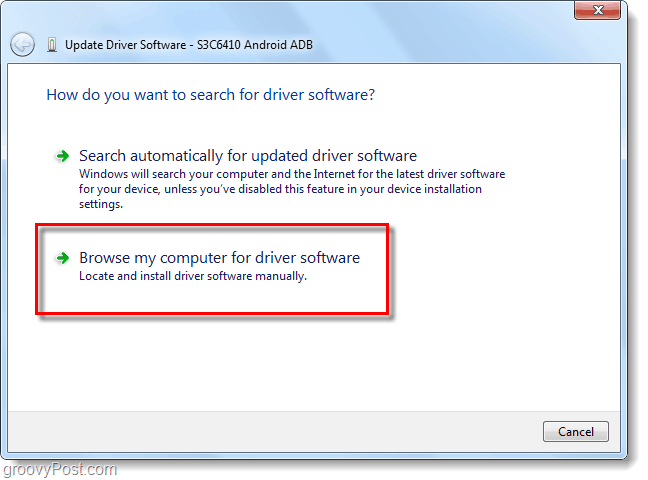
Click Browse my computer for driver software.
Step 7
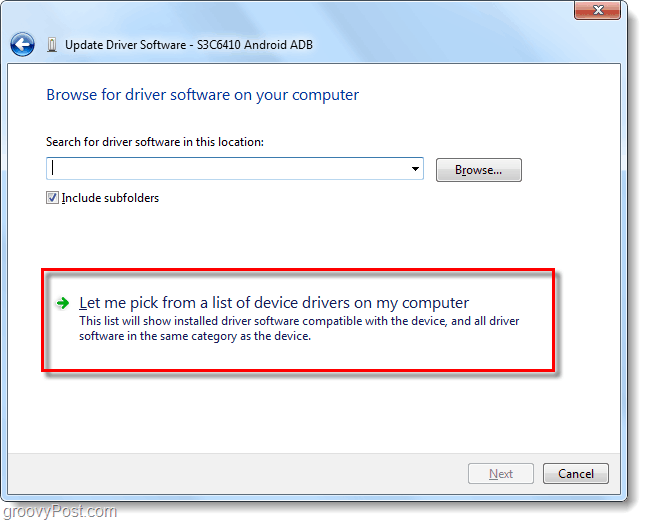
Click Let me pick from a list of device drivers on my computer.
Step 8
Click Show All Devices and then Click Next.
Step 9
Click Have Disk…
Step 10
Click Browse.
Step 11
Browse to the folder you extracted the Android SDK to. From there go to: Select android_winusb.inf and Click Open.
Step 12
Here you need to know whether your device is composite or not. Refer to Step 4 above to make sure. Under Model, Click Android ADB Interface* and then Click Next. *If you have a composite device Click the Composite option. Samsung Galaxy S is composite.
Step 13
A pesky warning will appear. Click Yes.
Done!
Now we are ready to take some screenshots!
#5. Run DDMS And Start Taking Screenshots!
Step 1 – Launch the Dalvik Debug Monitor!
In the folder you extracted the Android SDK to Browse to: In the Tools folder, Double-Click ddms.bat Tip: For future quick-access you may want to Pin this file to your start menu.
Step 2
Time to take a screenshot of what is currently being displayed on your Android phone. Click your Device from the list in the top-left pane. Then Click the Device menu and Select Screen capture… Tip: Or Select the phone from the list and then Press CTRL+S on your keyboard to save time.
Done! Finally!
Your screenshot will pop up in the Device Screen Capture window. The screenshot will likely be much larger than your actual device, this is because it captures it at the device’s true resolution. From here you can save your image, but don’t use the Save button. The save feature in this utility will greatly decrease the quality of your image! Instead you can Copy the screenshot to another program such as Paint and then save it. Remember, PNG is the best format!
Conclusion
You now know how to take screenshots of ANY Android device using your computer. For the Samsung Galaxy S this is currently the only technique that works, but I’ve heard rumors that in Android 2.2 (Froyo) you will be able to use a hardware key combination to take the screenshot! I can’t wait! wow… app to take screen shots without the above hassel I haven’t found any other reason to root the phone yet, so I don’t think I’ll be going that route either. Comment Name * Email *
Δ Save my name and email and send me emails as new comments are made to this post.
![]()

